This is my long journey to the tabbing experience of my dreams. Browser-tab tabbing, that is. The setup described in this post makes me productive every day. Maybe it could help you too.
Intro
Tabbing is an activity of opening and closing browser tabs during the day and sometimes during the night.
This post may look like it’s only for people who are deep into Vim, but this is not the case. It is, however, the post for people who largely prefer a keyboard over a mouse. But even if you don’t rely on shortcuts a lot, there are helpful tricks that can still make you more productive when working in the browser.
Here is the short overview of what we are going to look at:
- Vimium browser plugin for non-vimers
- Overriding new-tab in Chrome
- Creating light/dark theme-sensitive blank page
- Hosting the page on the macOS built-in Apache server
Vimium
I am a big fan of Vim. Rather, I like Vim bindings. I like them everywhere. Once you learn that for many things you don’t need to move you hand and grab that mouse, there is no way back.
Apart from enabling Vim plugins in all actively used IDEs and text editors, I also installed the Vimium browser extension to get Vim-like motions for web surfing. The functionality provided just by this Vim-simulating extension can feel overwhelming for people not familiar with Vim itself. However, even as a daily user I rarely require more than 20% of the features. In the end of the day, it’s just a different way of using shortcuts, and you’ll probably only need a few.
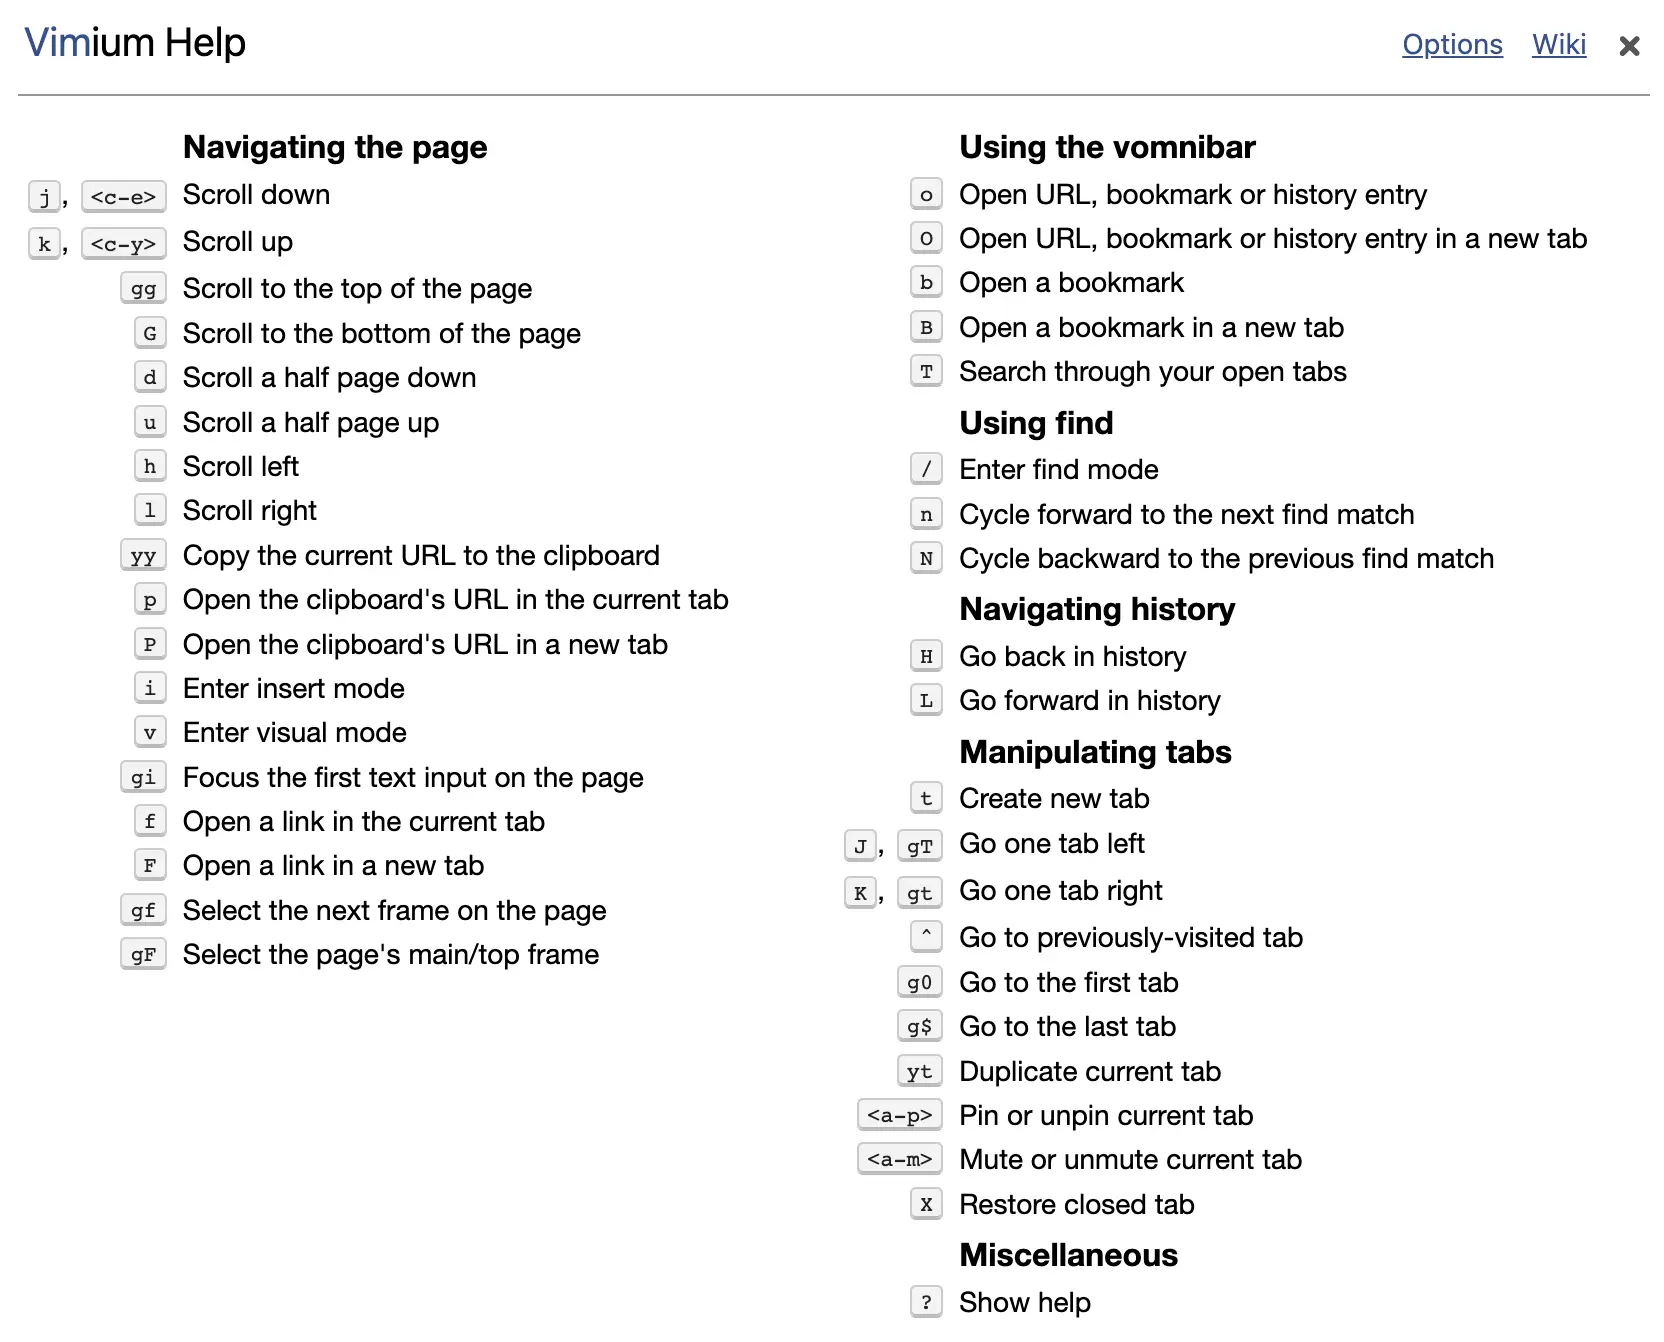
When using the extension, one peculiar thing I noticed about scrolling with j / k keys is that scrolling is much smoother that with the mouse wheel. I am not exactly sure what does the trick, but it’s one more reason for me to keep my hands on the keyboard.
The extension is very nice, but not without its problems. After stepping on a rake a couple of times, I applied these customizations in the Vimium settings:
unmap r
unmap x
What this essentially does is it disables the action when pressing the key: r (reload page) and x (close current tab). These bindings let me down when I was filling out large online forms. Lots of text to be typed in lots of fields. I would accidentally press r or x when no text field is focused. Then BOOM! — all progress is lost. Disabling those bindings definitely gave me peace of mind.
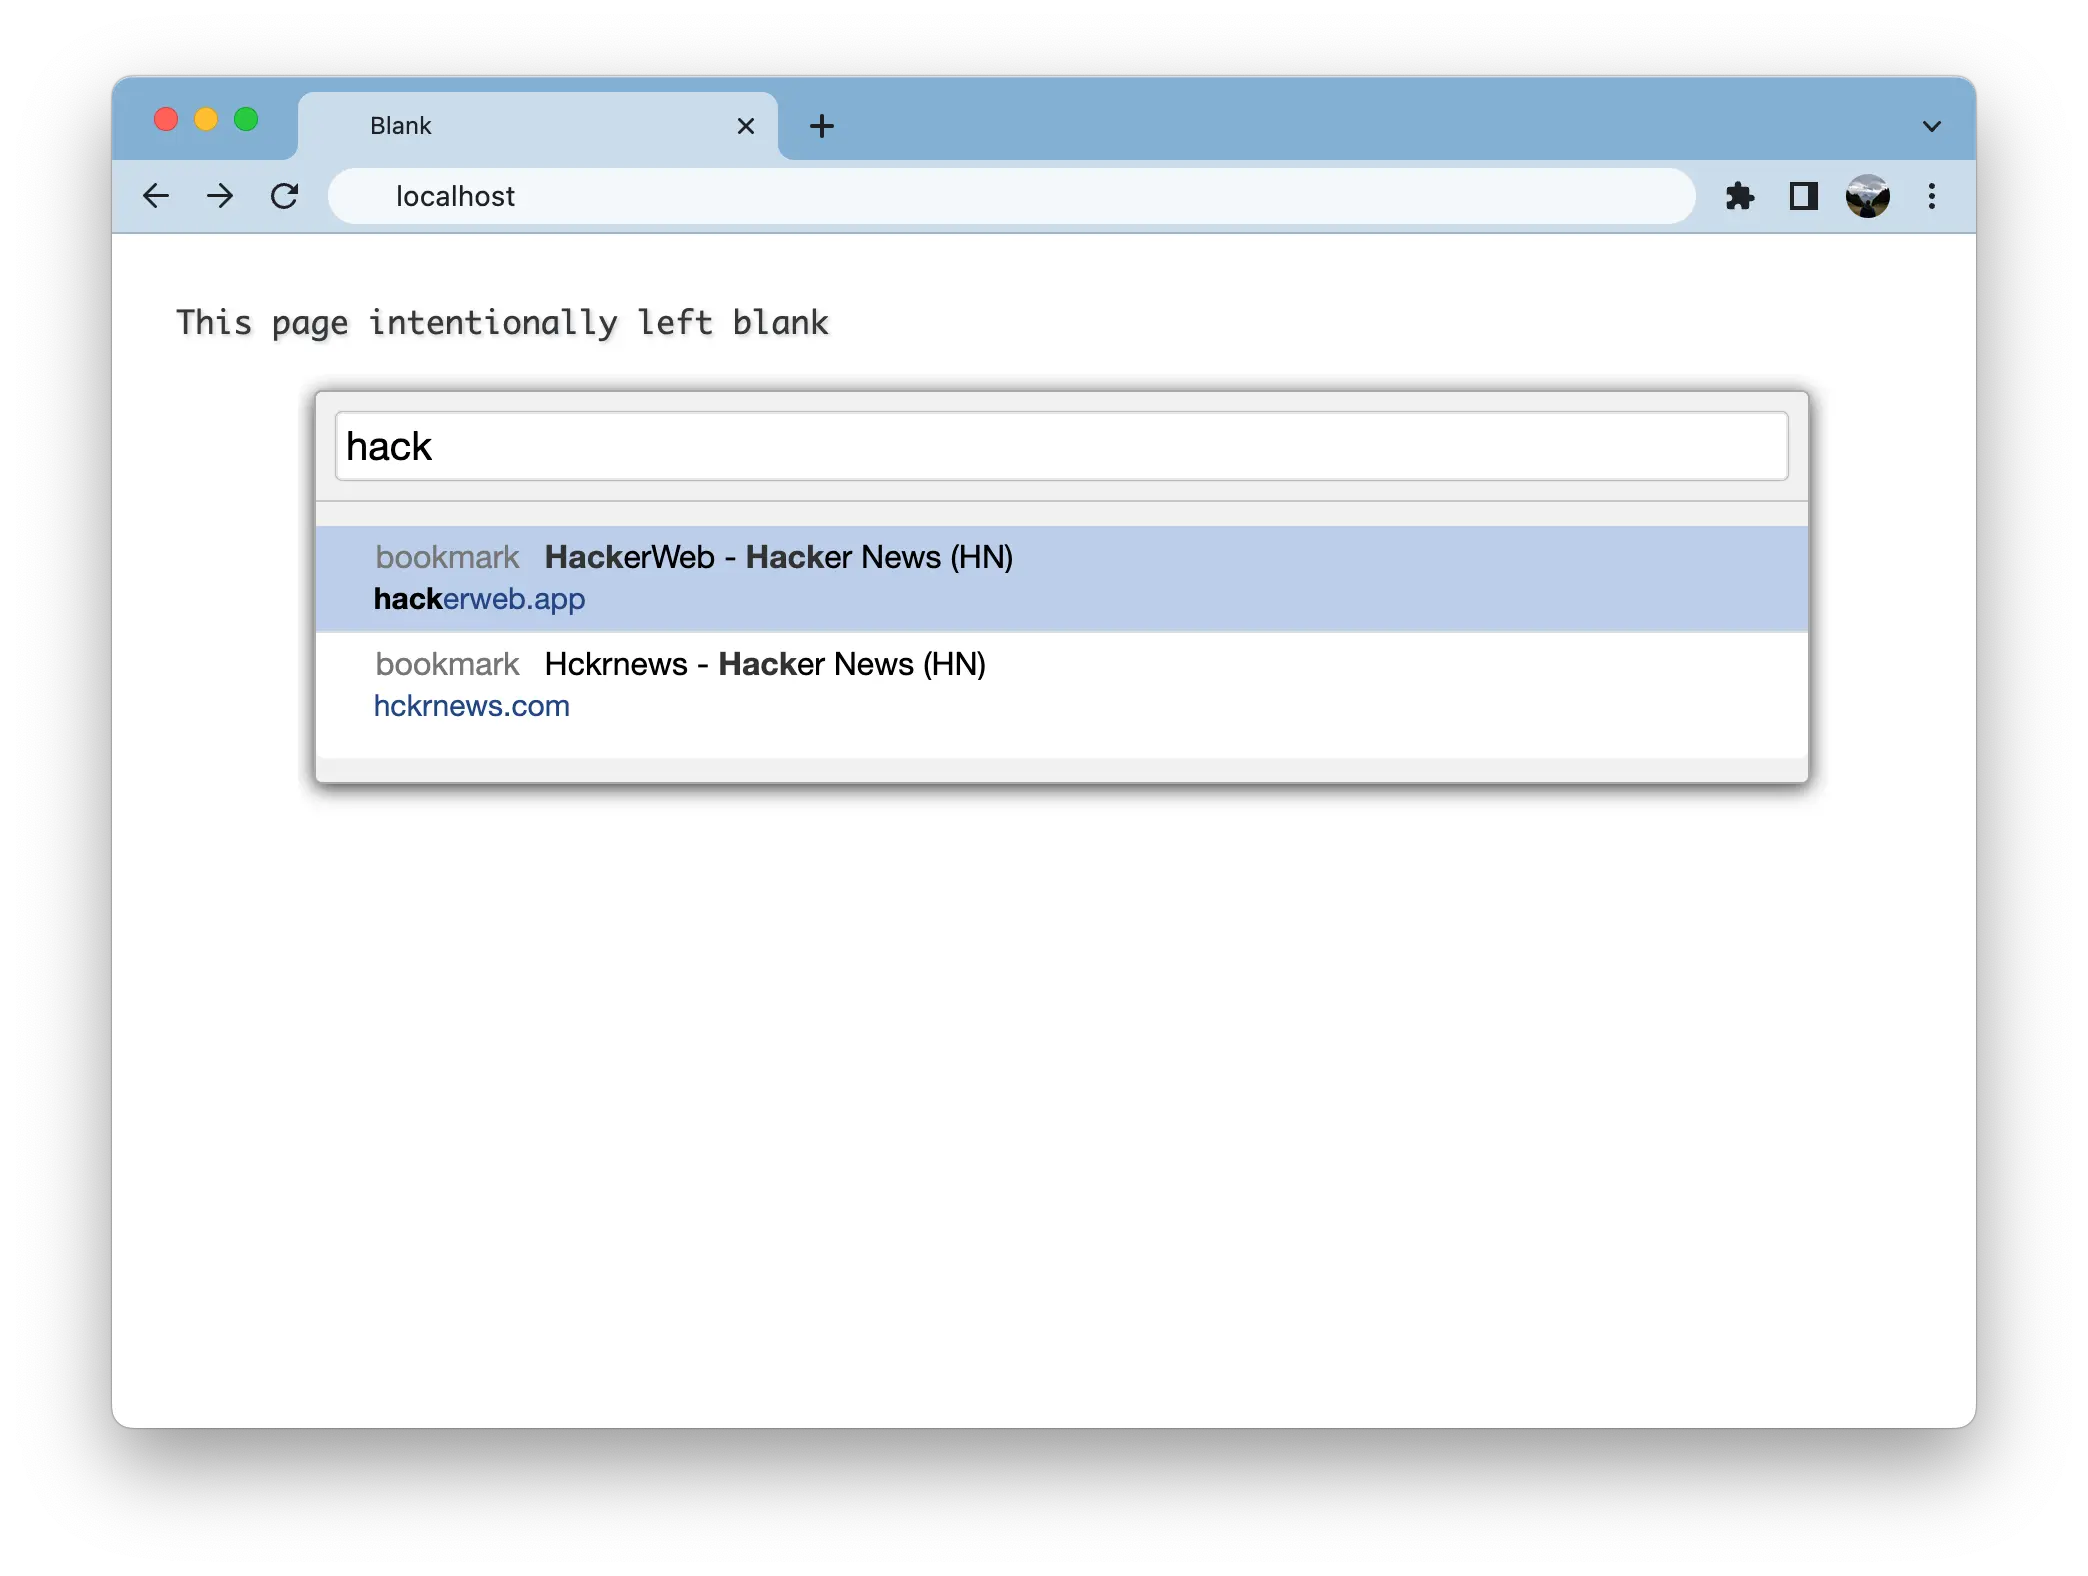
And so, I was happily using the extension in the browser until I found a feature seemingly unrelated to Vim. Using bindings such as o or b on any webpage opens a custom Vimium search bar. It allows you to search through your browser history, bookmarks and open tabs. Best of all is the search is fuzzy, meaning it works well with typos or just scattered letters. Most of the time to find what I want I need to type only one word or less. It is absolutely amazing!
There is one small thing, though. Opening this search bar does not work on that special page that Chrome opens in a new tab. In fact, none of the browser extensions work on that page.
This default new-tab page can be even more frustrating. I do not use Vimium tab navigation feature often, but I could imagine this breaks the flow for many folks who do. Once you hit this special page, you need to fall back to the standard browser shortcuts.
Let’s fix it!
New Tab Redirect
One of the solutions to the new-tab problem is to apply another browser extension. New Tab Redirect allows doing exactly what we want. If we set the new-tab URL in the extension options to https://www.google.com, it would already work as expected with Vimium.
For myself, however, I went with this amazing and stylish blank page which I found in the vast depths of the Internet at some point.
Regarding the New Tab Redirect itself, I found it very handy to enable Always update tab in the extension options. Whenever I open a new tab, it auto-selects the text in the address bar allowing me to start typing my web search immediately.
I was happy with this Vimium plus New Tab Redirect setup for a while. But at some point I decided to get fancy.
Changing appearances
Together with one of the macOS updates came the system support for the light and dark themes. I don’t think I prefer one over the other, but if it came down to a single choice I would probably pick the light theme to keep forever.
It is kind of nice, however, to make most things on display darker at night. But I am lazy, and I don’t want to toggle the theme every day. Fortunately, macOS offers the Auto option for the system appearance, which alternates between light and dark theme automatically at the right time.
At some point I enabled this feature and found it kinda cool. Especially because most of the apps I was using actually supported switching their themes together with the system. Though one thing was not cool at all — my blank new-tab page was bright and gray regardless of the time of the day.
Around the same time I learned that browsers support special media queries that are sensitive to the system appearance settings. More specifically, writing CSS selectors with certain modifiers allows to style the webpage differently, depending on whether light or dark theme is currently active. Even better, when the switch between themes happens, the browser dynamically applies those CSS rules, updating all the currently open pages.
I decided to make a clone of the blank page and add support for theme switching. Once that was done I started hosting the page on my website and pointed New Tab Redirect to that page. You can see the result here, and you are welcome to use it as your new tab. If you want to look inside and maybe tweak things, the source code of the page is stored in this gist.
One nice side effect of self-hosting the new-tab page was that I stopped sending signals to a third party every time I opened a new tab.
Well, at least to that third party, since I also configured a free Cloudflare CDN to fetch the blank page faster.
I also tried to help the browser caching the page for longer by configuring Cache-Control headers on the server: cache-control: public, max-age=604800, immutable.
All this was already pretty good, but maybe I don’t need to go to the Internet at all when I open tabs?
Going local-first
I started looking into how I can host my blank page not on my server, but on my machine itself. My first thought was to run Caddy about which I heard many good things. It is a server that makes setup of many modern things a breeze. Or so I thought, because I have never had a chance to find out, and there was that chance.
I was half-way through installing it when I realized that I forgot to try a simpler thing. One more dependency to install makes any setup ever so slightly more fragile. Maybe I could get by with something that is already available on the system? As it turns out, macOS comes with server software pre-installed!
Desktop server
Since forever the desktop version of macOS (as opposed to server variant) comes bundled with Apache server. Apache HTTP Server Project is one of the most popular choices when it comes to serving content on the web. According to w3techs it serves approximately a third of the internet web pages. The server itself is infinitely extensible and configurable, but we will need but a fraction of its abilities. In fact, all we need is for it to serve a single static page that is going to be stored in a local file.
In order to do a litmus check of the server we simply need to start it. We do this by running the following command in the terminal:
When you do this, you may see errors like AH00557 or AH00558, but those could be safely ignored since we are not planning to expose this server to the public internet.
Still, we will fix them in a bit.
We can check that the server has been successfully started by running the following:
If this is the case, the default server web page should be served on the localhost.
We can verify this by opening http://localhost in the browser.
It should show It works! text on the webpage.
This perfectly suits our needs!
All we need to do is replace the default page file with our custom blank page.
The default file is located at /Library/WebServer/Documents/index.html.en.
If you are curious, the en extension stands for English localization, but we will not change it.
Staying secure
The default configuration of the server may include directives that allow it to process requests originating from other machines within the local network. This is a reasonable assumption for the server software, however, for our use-case we would like to only allow local requests from the same machine.
There are multiple ways how we can restrict the access, but we will go with the Listen directive for simplicity.
The server config should be located in the /etc/apache2/httpd.conf file.
Note that you need to use sudo to edit the config as well.
We need to find the section of the config that uses the Listen directive.
It may look like Listen 80 or Listen *:80 and could also be under an IfDefine block.
What is important is to comment out or remove all Listen directives, because Apache would join them instead of overriding.
In the end we want only a single directive present in the config that forces the server to listen only for requests from localhost.
Listen 127.0.0.1:80While we are at it, editing the config, we might as well fix the errors mentioned above.
This is done by assigning a ServerName to our server.
You can choose whatever name you want, but a simple localhost should work.
There is a section in the config that describes the server name functionality.
We can add the following under it:
ServerName localhostAfter we edited the config, we need to restart the server.
Now we are running the server in a reasonably secure setting.
Swapping pages
Next thing to do is to get hold of the actual HTML file we are going to serve.
We can download the latest version of the blank page from the gist mentioned above into a local /tmp/blank.html file:
Then we override the default index file with the new content.
Note that sudo is required as the shared web documents are owned by the root user.
Now, if we go to http://localhost again we should see our blank page.
We can now go to the settings of New Tab Redirect extension and set localhost as the new address of a new tab.
Since localhost serves as a domain name, it does not require the http prefix!
Last but not least, we want to make sure that after a reboot our server is up and running to serve the page. Run this command to add Apache server to startup list:
In case you decide to disable startup behavior in the future, you can replace load with unload in the last command.
And with that, the job is done! I can now enjoy opening my new tabs more secure and even faster, while still having access to the Vimium search bar.
Conclusion
In this post we learned how to change the default new tab page in the browser to make use of Vimium features without interruptions. We’ve constructed a minimal blank page that responsively reacts to the system change between the light and the dark theme. Then we also configured the built-in macOS server to load this page without going to the internet.
Something that could be improved in the future is adding an alias to the localhost to make the new tab address look fancier in the browser. Additionally, you can also experiment with the content of the blank page. This could be anything from less minimalist design to personalized content.